ngrep: SIP traffic analyze

March 1st, 2016

tcpdump is a nice tool, but some filters seem to be too complicated for usage.

It’s quite simple to look at SIP traffic between our server and remote server with tcpdump:

tcpdump -pni eth0 udp and port 5060 and host 1.2.3.4

… or a little bit more verbose:

tcpdump -pni eth0 -v udp and port 5060 and host 1.2.3.4

… or even:

tcpdump -pni eth0 -v -As0 udp and port 5060 and host 1.2.3.4

But how to capture only INVITE messages?
This is the case to use ngrep:

root@voip-ge:~# ngrep -W byline "INVITE sip" port 5060 and host zz.nn.159.114
interface: eth0 (10.219.3.0/255.255.255.0)
filter: (ip or ip6) and ( port 5060 and host zz.nn.159.114 )
match: INVITE sip
#
U xx.yy.94.130:5060 -> zz.nn.159.114:5060
INVITE sip:412753@zz.nn.159.114 SIP/2.0.
v: SIP/2.0/UDP xx.yy.94.130:5060;branch=z9hG4bK51d42193.
Max-Forwards: 70.
f: "SomeCallerID" sip:0606@xx.yy.94.130;tag=as07e569d2.
t: sip:412753@zz.nn.159.114.
m: sip:0606@xx.yy.94.130:5060.
i: 795031de44fe066e3751fdc6218368e7@xx.yy.94.130:5060.
CSeq: 102 INVITE.
User-Agent: Cisco-SIPGateway/IOS-12.x.
Date: Tue, 01 Mar 2016 07:05:13 GMT.
Allow: INVITE, ACK, CANCEL, OPTIONS, BYE, REFER, SUBSCRIBE, NOTIFY, INFO, PUBLISH, MESSAGE.
k: replaces.
c: application/sdp.
l: 299.
.
v=0.
o=CiscoSystemsSIP-GW-UserAgent 886157825 886157825 IN IP4 xx.yy.94.130.
s=SIP Call.
c=IN IP4 xx.yy.94.130.
t=0 0.
m=audio 19504 RTP/AVP 8 0 101.
a=rtpmap:8 PCMA/8000.
a=rtpmap:0 PCMU/8000.
a=rtpmap:101 telephone-event/8000.
a=fmtp:101 0-16.
a=silenceSupp:off - - - -.
a=ptime:20.
a=sendrecv.

acmepacket: import/export HMR

February 9th, 2016
conf t -> session-router -> sip-manipulation

Select some HMR and then do:

export %filename%

After that a %filename%.gz will appear under /code/imports/ directory. And you can download it via FTP/SFTP.

It is also possible to import sip-manipulation rules. Put your .gz file with the same structure to /code/imports/ , then go to conf t -> session-router -> sip-manipulation and do:

import %filename%.gz

sed: add line starting with 2 tabs before another matching line

February 5th, 2016

Add a line Sipaddheader(X-DSTPHONE:${E}); before lines containing zabbix.

sed '/zabbix/a Sipaddheader(X-DSTPHONE:${E});' extensions.ael > extensions2.ael

Add the same but starting with 2 tabs seems to be not hard. But the problem is that not all sed versions support \t parameter.

So, neither of these worked for me:

sed '/zabbix/a \t\tSipaddheader(X-DSTPHONE:${E});' extensions.ael > extensions2.ael
sed '/zabbix/a \t\t Sipaddheader(X-DSTPHONE:${E});' extensions.ael > extensions2.ael
sed '/zabbix/a\t\t Sipaddheader(X-DSTPHONE:${E});' extensions.ael > extensions2.ael

The solution is as follows: insert a literal tab pressing Ctrl-V and then Tab (not shown in the listing).

Asterisk: Queue statistics

January 29th, 2016

As it’s said in queues.conf:

  ; If set to yes, the following variables will be set
  ; just prior to the caller being bridged with a queue member
  ; and just prior to the caller leaving the queue
  ; QUEUENAME name of the queue
  ; QUEUEMAX maxmimum number of calls allowed
  ; QUEUESTRATEGY the strategy of the queue;
  ; QUEUECALLS number of calls currently in the queue
  ; QUEUEHOLDTIME current average hold time
  ; QUEUECOMPLETED number of completed calls for the queue
  ; QUEUEABANDONED number of abandoned calls
  ; QUEUESRVLEVEL queue service level
  ; QUEUESRVLEVELPERF current service level performance
  ;
  ;setqueuevar=no

So, add ‘setqueuevar=yes’ to each queue definition in queues.conf and then modify your dialplan after execution of the Queue application:

  Queue(${EXTEN},t,,,25);

  // to enable Queue statistics
  NoOp(${QUEUE_VARIABLES(${EXTEN})});

  NoOp(QUEUESTRATEGY is ${QUEUESTRATEGY});
  NoOp(QUEUECALLS is ${QUEUECALLS});
  NoOp(QUEUEHOLDTIME is ${QUEUEHOLDTIME});
  NoOp(QUEUECOMPLETED is ${QUEUECOMPLETED});
  NoOp(QUEUEABANDONED is ${QUEUEABANDONED});
  NoOp(QUEUESRVLEVEL is ${QUEUESRVLEVEL});
  NoOp(QUEUESRVLEVELPERF is ${QUEUESRVLEVELPERF})

Console output:

  Executing [007@inc:33] NoOp("007@inc-1658;2", "0") in new stack
  Executing [007@inc:34] NoOp("007@inc-1658;2", "QUEUESTRATEGY is ringall") in new stack
  Executing [007@inc:35] NoOp("007@inc-1658;2", "QUEUECALLS is 0") in new stack
  Executing [007@inc:36] NoOp("007@inc-1658;2", "QUEUEHOLDTIME is 6") in new stack
  Executing [007@inc:37] NoOp("007@inc-1658;2", "QUEUECOMPLETED is 12778") in new stack
  Executing [007@inc:38] NoOp("007@inc-1658;2", "QUEUEABANDONED is 34844") in new stack
  Executing [007@inc:39] NoOp("007@inc-1658;2", "QUEUESRVLEVEL is 10") in new stack
  Executing [007@inc:40] NoOp("007@inc-1658;2", "QUEUESRVLEVELPERF is 54.6") in new stack

Provisioning Linksys SPA-9XX and Cisco SPA-30X

December 3rd, 2015

First of all, a nice PDF with a bunch of useful links: https://supportforums.cisco.com/sites/default/files/legacy/0/8/6/41680-SPA_DocsMap_012711.pdf

1. There are two ways of provisioning:

– using TFTP/FTP/HTTP server and pushing it’s address with the DHCP option, in case of using DHCP server in your network. In this case the phone will try to download the configuration/firmware from the server specified during the next reboot. But we need to reboot phones forcibly after that.

– without using DHCP server and dhcp-options. Just telling the phone with a direct HTTP request the URL path of config file/firmware to load, either from browser, or from Linux console, using curl. In this case the phone reboots automatically to apply the newly downloaded config/firmware (if there is an active call, the phone waits for its end and only then reboots to aply config. But I haven’t tried to upgrade firmware during the active call).

Download the archive with firmware, unpack it and rename the firmware file from something like spa50x-30x-7-4-9c.bin to spa.bin.

Next, we need some server, e.g. a small simple HTTP server weborf.
After installing, run it, specifying the directory with spa.bin file:

weborf -p 8000 -b /home/lexus/downloads/spa_303_firmware_7.5.5/

If there is Python installed on your machine, you may use its built-in http-server, running this command from a directory with spa.bin:

python -m SimpleHTTPServer 8000

Remember that it’s not always possible to skip firmware releases, for example I tried:
– 7.5.2 —> 7.6.1 – unsuccessful
– 7.5.2 —> 7.5.5 – OK
– 7.5.1 —> 7.5.5 – unsuccessful
– 7.4.9c —> 7.5.5 – unsuccessful
– 7.4.9c —> 7.5.1 – OK.

Read below how to upgrade the firmware.

2. Let’s imagine, we need to change the configuration of a phone. We need to disable the Call Forward feature.
First of all look through the XML-config file of a working phone: http://phone.ip/admin/spacfg.xml
To disable CallForward feature we need to change this parameter from ‘Yes’ to ‘No’:
spa303_provisioning2

Tip: all XML parameters are called the same way as in the web-interface, but with underscore instead of spaces

Create the spa303.cfg text file in your web-server directory:
spa303_provisioning1

And now tell the phone using curl to apply it:

curl --anyauth -u admin:pass http://phone/admin/resync?http://websrv.ip:8000/spa303.cfg

3. You may also provision phones from web-interface:

http://phone-ip/admin/upgrade?http://10.145.13.51:8000/spa.bin
http://phone-ip/admin/resync?http://10.145.13.51:8000/spa303.cfg

… but this is not true way :) .

It’s much more cool to do everything with curl:

curl --anyauth -u admin:pass http://10.145.13.232/admin/reboot
curl --anyauth -u admin:pass http://10.145.13.229/admin/upgrade?http://10.145.13.51:8000/spa.bin
curl --anyauth -u admin:pass http://10.145.13.229/admin/resync?http://10.145.13.51:8000/spa303.cfg

… they say, it’s also possible to use ‘–digest’ option in curl, but I haven’t tried, as ‘–anyauth’ works fine.

Tips and Hints:

Assuming you’re using ISC-DHCPD server:

        host spa303-1353 {      hardware ethernet 3c:ce:73:d3:f9:dc;
                                fixed-address 10.145.14.103; }

        host cisco303-1354 {    hardware ethernet 3c:ce:73:d3:e9:e4;
                                fixed-address 10.145.14.104; }

…and need to get all phone IP addresses from its config. Do:

grep -A1 spa dhcpd.conf | grep -vE '^#' | grep fixed-address | grep -o '[0-9]\{1,3\}\.[0-9]\{1,3\}\.[0-9]\{1,3\}\.[0-9]\{1,3\}'
grep -A1 cisco dhcpd.conf | grep -vE '^#' | grep fixed-address | grep -o '[0-9]\{1,3\}\.[0-9]\{1,3\}\.[0-9]\{1,3\}\.[0-9]\{1,3\}'

… and create a text file SPA_ips_from_dhcp.txt .

But DHCPd config may contain records of non-existent phones, that’s why we need to check if the IP addresses are real network devices (that they reply to OPTIONS SIP-requests), and these devices are Cisco and/or Linksys phones (useragent is Cisco… or Linksys…).

We’ll use sipvicious tool for that (make sure to have Python installed to run it):

python svmap.py --inputtext=/home/lexus/SPA_ips_from_dhcp.txt | grep -i SPA | awk '{print $2}' | sed 's/.....$//'

… and write this list to SPA_ips_alive.txt .

Now it’s time to provision the actual list of IP-phones with the script:

spa303_provisioning3

Linphone: command line interface

November 24th, 2015

voip_nerd
Wanna be a real VoIP nerd? :-) Let’s use Linphone from a command line!

1. ‘linphonec’ – enter the CLI.
2. ‘help’ – list available commands. Now it’s time to create a profile and connect to PBX
3. ‘help proxy’ – show help.
3.1. ‘proxy add’ – and press Enter. Answer to the appeared questions (just look at listing below):

linphonec> proxy add
Adding new proxy setup. Hit ^D to abort.
Enter proxy sip address: 10.1.51.13
Your identity for this proxy: sip:1301@10.1.51.13
Do you want to register on this proxy (yes/no): yes
Specify register expiration time in seconds (default is 600): 
Expiration: 0 seconds
Specify route if needed: 
No route specified.
--------------------------------------------
sip address: 
route: 
identity: sip:1301@10.1.51.13
register: yes
expires: 0
registered: no
--------------------------------------------
Accept the above proxy configuration (yes/no) ?: yes
Proxy added.
linphonec> 
Password for 1301 on "pbx.secretcompany.com": MeGaSeCuRePaSs

linphonec> Unregistration on sip:10.1.51.13 done.
linphonec>

Yes, the message ‘Unregistration on sip:10.1.51.13 done.’ seems strange, but tcpdump shows that everything is OK.

3.2. Now we may list our proxies:

linphonec> proxy list
****** Proxy 0 - this is the default one - *******
sip address: 
route: 
identity: sip:1301@10.1.51.13
register: yes
expires: 0
registered: no
linphonec>

4. Let’s call via default proxy:

linphonec> call 79991234567
Establishing call id to <sip:79991234567@10.1.51.13>, assigned id 1
Contacting <sip:79991234567@10.1.51.13>
linphonec> Call 1 to <sip:79991234567@10.1.51.13> in progress.
linphonec> Remote ringing.
linphonec> Early media.
linphonec> Call 1 with <sip:79991234567@10.1.51.13> early media.
Call 1 with <sip:79991234567@10.1.51.13> connected.
Call answered by <sip:79991234567@10.1.51.13>.
linphonec> Media streams established with <sip:79991234567@10.1.51.13> for call 1 (audio).

We may look active calls with ‘calls’ command.
This is how it looks like while ringing:

linphonec> calls
Call states
Id |            Destination              |      State      |    Flags   |
------------------------------------------------------------------------
2  | sip:79991234567@10.1.51.13          | OutgoingEarlyMedia | 

And this is how it looks like during an established call:

linphonec> calls
Call states
Id |            Destination              |      State      |    Flags   |
------------------------------------------------------------------------
2  | sip:79991234567@10.1.51.13          | StreamsRunning  | 

If you want to terminate a call, just type ‘terminate’ and press Enter.

If you have some troubles with sound and your PC is behind NAT, play with following parameters: ‘firewall’ and ‘nat’. Maybe you need ‘firewall none’ (it helped me at previous linphonec setup with one-way sound).

5. You may quit linphonec with ‘quit’ command. And these are history log, call log and configuration file in your home directory:

lexus@lexus:~$ ls -lh .linph*
-rw------- 1 lexus lexus  162 нояб. 24 15:10 .linphonec_history
-rw------- 1 lexus lexus 2,5K нояб. 24 15:10 .linphonerc

6. Read the documentation for more information.

sed: batch file rename

October 16th, 2015

Deleting plus sign from multiple filenames.

Is:

-rw-r--r--. 1 root root  153771 Oct 16 10:11 node-01-1444744974.2017874_in_+38050190.ogg
-rw-r--r--. 1 root root  167217 Oct 16 10:11 node-03-1444736219.1609540_in_+38050190.ogg
-rw-r--r--. 1 root root  141165 Oct 16 10:11 node-07-1444726601.1585794_in_+38073454.ogg
-rw-r--r--. 1 root root  193136 Oct 16 10:11 node-27-1444726479.1648259_in_+38073454.ogg

Must be:

-rw-r--r--. 1 root root  153771 Oct 16 09:58 node-01-1444744974.2017874_in_38050190.ogg
-rw-r--r--. 1 root root  167217 Oct 16 09:58 node-03-1444736219.1609540_in_38050190.ogg
-rw-r--r--. 1 root root  141165 Oct 16 09:56 node-07-1444726601.1585794_in_38073454.ogg
-rw-r--r--. 1 root root  193136 Oct 16 09:57 node-27-1444726479.1648259_in_38073454.ogg

Script:

#!/bin/bash

for i in *ogg
do
	mv "$i" "`echo $i | sed 's/\+//'`"
done

OpenSIPS: protecting from undesired requests

July 26th, 2015

Original: http://lists.opensips.org/pipermail/users/2013-March/024887.html

A few suggestions (mostly already suggested by many guys in this thread, i
am only arranging their order to a secure setup), opensips log level should
be at least 2.

1. I usually filter out all known nasty users / attackers right in sanity
check section of default request route. My sanity check section structured
something like this,

a). check max forwards.
b). check message size.
c). check user-agent string against filter list, you can use
permissions module for this as well as hard code user-agents as Nick
suggested.

############################################
route {
if (!mf_process_maxfwd_header("10")) {
     sl_send_reply("483","Too Many Hops");
     exit;
};

if (msg:len > max_len) {
     sl_send_reply("513","Message Too Big");
     exit;
};

if ($ua =~ "friendly-scanner") {
     xlog("L_WARN", "[$pr:$fU@$si:$sp]: Rejecting '$rm' request from bogus device '$ua' \n");
     exit;
};
...
#####################################

2. Then in authentication section, i make sure to authenticate both INVITE
and REGISTER requests, you check ret-code for both www-authorize and
proxy-authorize methods and if it is -1 or -2 then do xlog to print log on
intruder which is picked by fail2ban to block the user (make sure text
pattern in your xlog matches failregex in fail2ban! ).

Negative code meanings: http://www.opensips.org/html/docs/modules/2.1.x/auth_db.html#id293676

#####################################
...
if (!www_authorize("","subscriber")) {

     switch ($retcode) {
     case -1:
          xlog("L_NOTICE", "[$pr:$fU@$si:$sp]: Auth error for '$tU' from '$si',
          peer not found - User-Agent: '$ua' \n");
          break;
     case -2:
          xlog("L_NOTICE", "[$pr:$fU@$si:$sp]: Auth error for '$tU' from '$si',
          wrongpassword - User-Agent: '$ua' \n");
          break;
          ...
     };

www_challenge("", "1");
exit;
};
...
#######################################

sox, ffmpeg: mp3 to wav, gsm to wav

July 6th, 2015

m4a to wav:

ffmpeg -i audiofile.m4a audiofile.wav

MP3 to WAV:
user@pc:~$ sox -t mp3 fromfile.mp3 -t wav -r 8k tofile.wav channels 1
user@pc:~/Downloads$ file tofile.wav
tofile.wav: RIFF (little-endian) data, WAVE audio, Microsoft PCM, 16 bit, mono 8000 Hz

or using mpg321:

mpg321 -w output.wav input.mp3

GSM to WAV:
lexus@lexus:~$ sox beep2.gsm -r 8000 --encoding=signed-integer beep2.wav channels 2
lexus@lexus:~$ file beep2.wav
beep2.wav: RIFF (little-endian) data, WAVE audio, Microsoft PCM, 16 bit, stereo 8000 Hz

OGG to WAV:
lexus@lexus:~$ ffmpeg -i in_file.ogg out_file.wav

Change WAV file bitrate from 44100 to 8000:
lexus@lexus:~$ file file44100.wav
file44100.wav: RIFF (little-endian) data, WAVE audio, Microsoft PCM, 16 bit, stereo 44100 Hz
lexus@lexus:~$ sox file44100.wav -r 8000 file8000.wav
sox WARN rate: rate clipped 12 samples; decrease volume?
sox WARN dither: dither clipped 8 samples; decrease volume?

For newer versions of sox, working example:

stereo to mono:
sox stereo.wav mono.wav channels 1

44100 t0 8000:
sox big.wav small.wav rate 8000

AcmePacket: Reject calls from subscribers with hidden cell number

February 26th, 2015

Depending on GSM operator the values in SIP headers may vary. In my case if a subscriber activated the ability to hide cell number, the ‘uri-user’ parameter in SIP-header ‘From’ contains not cell number but ‘anonymous’. I had a task to reject such calls.

There already were 2 header-rules – one doing storing of ‘To’ headers’ values with VoIP provider’s DIDs inside , and the second – manipulating the ‘From’ headers, according to the stored values.

If I added the 3rd header-rule (last in the list) trying to reject anonymous calls, it haven’t worked, so it was necessary to keep it on the top of header-rules. (the ‘move’ command doesn’t work for me, though I’ve read in one Oracle/AcmePacket HMR guide that it’s possible, maybe my firmware does not support it)

Here’s the rule itself:

header-rule
		name                           rejectAnonymous
		header-name                    From
		action                         manipulate
		comparison-type                case-insensitive
		msg-type                       request
		methods                        INVITE
		match-value                    
		new-value                      
		element-rule
			name                           rejAnonymous
			parameter-name                 From
			type                           uri-user
			action                         reject
			match-val-type                 any
			comparison-type                case-insensitive
			match-value                    Anonymous
			new-value                      

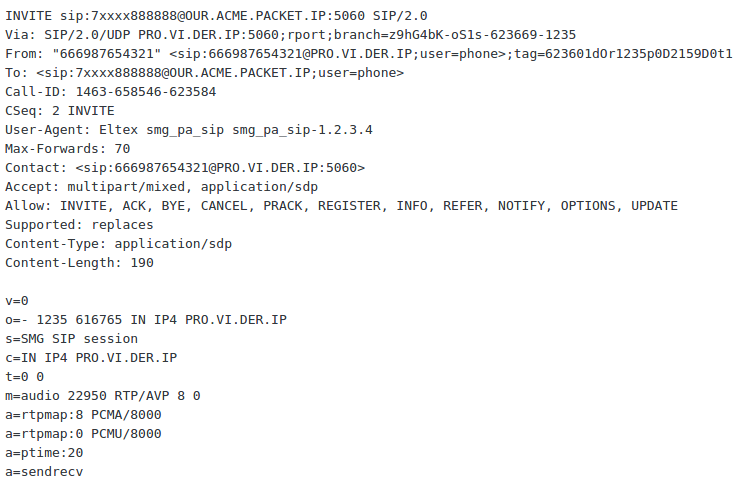
Have a look at these nice screenshots demonstrating the initial INVITE from anonymous:

invite_anonymous

… and rejecting this call by AcmePacket 4250 with ‘400 Bad Request’ response:

400_bad_request