Archive for the ‘Uncategorized’ Category

Asterisk: ODBC configuration files relations

Monday, June 6th, 2016

https://wiki.asterisk.org/wiki/display/AST/Getting+Asterisk+Connected+to+MySQL+via+ODBC
https://wiki.asterisk.org/wiki/display/AST/Configuring+res_odbc

odbcinst.ini
===================

[MySQL]
Description = ODBC for MySQL
Driver = /usr/lib/odbc/libmyodbc.so
Setup = /usr/lib/odbc/libodbcmyS.so
FileUsage = 1

odbc.ini
===============

[asterisk-connector]
Description	= MySQL connection to 'asterisk' database
Driver = MySQL
Database = asterisk
Server = localhost
Port = 3306
Socket = /var/lib/mysqld/mysqld.sock

res_odbc.conf
====================

[asterisk]
enabled => yes
dsn => asterisk-connector	// points to DB connection in odbc.ini
username => asterisk
password => welcome
pooling => no
limit => 1
pre-connect => yes

cdr_adaptive_odbc.conf
==============================

connection = asterisk // The database connection to be used. This is a reference 
                      // to the configured connection in res_odbc.conf. This field is required.
table = // The table name. This field is required.

AcmePacket: go on rejecting!

Thursday, May 19th, 2016

One more post about INVITE rejecting.

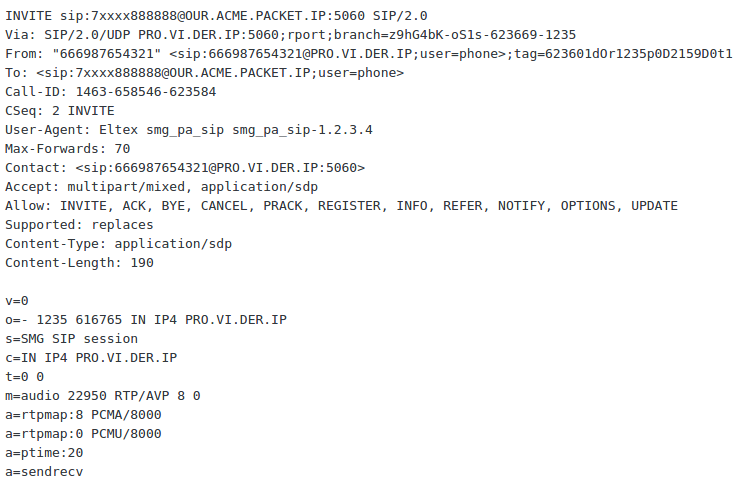
The task: reject malicious SIP traffic coming from some country to our number. All INVITEs contain a From: header with 12-digits number starting with 666. The may also contain a plus sign at the beginning or 810, or +810.

It is also important to set a ‘new-value’ parameter, containing a status code and SIP description (in form of “Code:Description”), as some (or maybe most) PBXses/softswitches/proxies go on sending INVITEs if we just do ‘action reject’. After answering from AcmePacket with something like “403 Forbidden” the remote side stops sending endless INVITEs to AcmePacket.

acme_reject_with_prefix

Part of sip-manipulation:

        header-rule
                name                                    dropHACKERS
                header-name                             From
                action                                  manipulate
                comparison-type                         pattern-rule
                msg-type                                any
                methods                                 INVITE
                match-value                             
                new-value                               
                element-rule
                        name                                    dropHACKERS1
                        parameter-name                          From
                        type                                    uri-phone-number-only
                        action                                  reject
                        match-val-type                          any
                        comparison-type                         pattern-rule
                        match-value                             666[0-9]{9}$
                        new-value                               403:Forbidden

This is how it looks like after rejecting malicious INVITE with “403 Forbidden”:
acme_reject_with_prefix2

SQL: get the database size

Friday, March 25th, 2016

I’m going on writing primitive posts about the fascinating world of relational database management systems. :)

MySQL, size of all databases:

mysql> SELECT table_schema \
       "Database name", \
       sum( data_length + index_length ) / 1024 / 1024 \
       "Data Base Size in MB" FROM \
       information_schema.TABLES GROUP BY table_schema;
+--------------------+----------------------+
| Database name      | Data Base Size in MB |
+--------------------+----------------------+
| fluxbb             |           0.04585648 |
| information_schema |           0.00781250 |
| mysql              |           0.60614872 |
| wordpress          |           2.22493362 |
+--------------------+----------------------+
4 rows in set (0.13 sec)

PostgreSQL, size of all databases:

cdr=> SELECT pg_database.datname,pg_size_pretty(pg_database_size(pg_database.datname)) \
      AS size FROM pg_database;
  datname  |  size   
-----------+---------
 template1 | 6705 kB
 template0 | 6697 kB
 postgres  | 6820 kB
 cdr       | 28 GB

Size of ‘acme_cdr’ table:

cdr=> SELECT pg_size_pretty(pg_total_relation_size('acme_cdr'));
 pg_size_pretty 
----------------
 28 GB

ngrep: SIP traffic analyze

Tuesday, March 1st, 2016

tcpdump is a nice tool, but some filters seem to be too complicated for usage.

It’s quite simple to look at SIP traffic between our server and remote server with tcpdump:

tcpdump -pni eth0 udp and port 5060 and host 1.2.3.4

… or a little bit more verbose:

tcpdump -pni eth0 -v udp and port 5060 and host 1.2.3.4

… or even:

tcpdump -pni eth0 -v -As0 udp and port 5060 and host 1.2.3.4

But how to capture only INVITE messages?
This is the case to use ngrep:

root@voip-ge:~# ngrep -W byline "INVITE sip" port 5060 and host zz.nn.159.114
interface: eth0 (10.219.3.0/255.255.255.0)
filter: (ip or ip6) and ( port 5060 and host zz.nn.159.114 )
match: INVITE sip
#
U xx.yy.94.130:5060 -> zz.nn.159.114:5060
INVITE sip:412753@zz.nn.159.114 SIP/2.0.
v: SIP/2.0/UDP xx.yy.94.130:5060;branch=z9hG4bK51d42193.
Max-Forwards: 70.
f: "SomeCallerID" sip:0606@xx.yy.94.130;tag=as07e569d2.
t: sip:412753@zz.nn.159.114.
m: sip:0606@xx.yy.94.130:5060.
i: 795031de44fe066e3751fdc6218368e7@xx.yy.94.130:5060.
CSeq: 102 INVITE.
User-Agent: Cisco-SIPGateway/IOS-12.x.
Date: Tue, 01 Mar 2016 07:05:13 GMT.
Allow: INVITE, ACK, CANCEL, OPTIONS, BYE, REFER, SUBSCRIBE, NOTIFY, INFO, PUBLISH, MESSAGE.
k: replaces.
c: application/sdp.
l: 299.
.
v=0.
o=CiscoSystemsSIP-GW-UserAgent 886157825 886157825 IN IP4 xx.yy.94.130.
s=SIP Call.
c=IN IP4 xx.yy.94.130.
t=0 0.
m=audio 19504 RTP/AVP 8 0 101.
a=rtpmap:8 PCMA/8000.
a=rtpmap:0 PCMU/8000.
a=rtpmap:101 telephone-event/8000.
a=fmtp:101 0-16.
a=silenceSupp:off - - - -.
a=ptime:20.
a=sendrecv.

acmepacket: import/export HMR

Tuesday, February 9th, 2016
conf t -> session-router -> sip-manipulation

Select some HMR and then do:

export %filename%

After that a %filename%.gz will appear under /code/imports/ directory. And you can download it via FTP/SFTP.

It is also possible to import sip-manipulation rules. Put your .gz file with the same structure to /code/imports/ , then go to conf t -> session-router -> sip-manipulation and do:

import %filename%.gz

sed: add line starting with 2 tabs before another matching line

Friday, February 5th, 2016

Add a line Sipaddheader(X-DSTPHONE:${E}); before lines containing zabbix.

sed '/zabbix/a Sipaddheader(X-DSTPHONE:${E});' extensions.ael > extensions2.ael

Add the same but starting with 2 tabs seems to be not hard. But the problem is that not all sed versions support \t parameter.

So, neither of these worked for me:

sed '/zabbix/a \t\tSipaddheader(X-DSTPHONE:${E});' extensions.ael > extensions2.ael
sed '/zabbix/a \t\t Sipaddheader(X-DSTPHONE:${E});' extensions.ael > extensions2.ael
sed '/zabbix/a\t\t Sipaddheader(X-DSTPHONE:${E});' extensions.ael > extensions2.ael

The solution is as follows: insert a literal tab pressing Ctrl-V and then Tab (not shown in the listing).

Asterisk: Queue statistics

Friday, January 29th, 2016

As it’s said in queues.conf:

  ; If set to yes, the following variables will be set
  ; just prior to the caller being bridged with a queue member
  ; and just prior to the caller leaving the queue
  ; QUEUENAME name of the queue
  ; QUEUEMAX maxmimum number of calls allowed
  ; QUEUESTRATEGY the strategy of the queue;
  ; QUEUECALLS number of calls currently in the queue
  ; QUEUEHOLDTIME current average hold time
  ; QUEUECOMPLETED number of completed calls for the queue
  ; QUEUEABANDONED number of abandoned calls
  ; QUEUESRVLEVEL queue service level
  ; QUEUESRVLEVELPERF current service level performance
  ;
  ;setqueuevar=no

So, add ‘setqueuevar=yes’ to each queue definition in queues.conf and then modify your dialplan after execution of the Queue application:

  Queue(${EXTEN},t,,,25);

  // to enable Queue statistics
  NoOp(${QUEUE_VARIABLES(${EXTEN})});

  NoOp(QUEUESTRATEGY is ${QUEUESTRATEGY});
  NoOp(QUEUECALLS is ${QUEUECALLS});
  NoOp(QUEUEHOLDTIME is ${QUEUEHOLDTIME});
  NoOp(QUEUECOMPLETED is ${QUEUECOMPLETED});
  NoOp(QUEUEABANDONED is ${QUEUEABANDONED});
  NoOp(QUEUESRVLEVEL is ${QUEUESRVLEVEL});
  NoOp(QUEUESRVLEVELPERF is ${QUEUESRVLEVELPERF})

Console output:

  Executing [007@inc:33] NoOp("007@inc-1658;2", "0") in new stack
  Executing [007@inc:34] NoOp("007@inc-1658;2", "QUEUESTRATEGY is ringall") in new stack
  Executing [007@inc:35] NoOp("007@inc-1658;2", "QUEUECALLS is 0") in new stack
  Executing [007@inc:36] NoOp("007@inc-1658;2", "QUEUEHOLDTIME is 6") in new stack
  Executing [007@inc:37] NoOp("007@inc-1658;2", "QUEUECOMPLETED is 12778") in new stack
  Executing [007@inc:38] NoOp("007@inc-1658;2", "QUEUEABANDONED is 34844") in new stack
  Executing [007@inc:39] NoOp("007@inc-1658;2", "QUEUESRVLEVEL is 10") in new stack
  Executing [007@inc:40] NoOp("007@inc-1658;2", "QUEUESRVLEVELPERF is 54.6") in new stack

Provisioning Linksys SPA-9XX and Cisco SPA-30X

Thursday, December 3rd, 2015

First of all, a nice PDF with a bunch of useful links: https://supportforums.cisco.com/sites/default/files/legacy/0/8/6/41680-SPA_DocsMap_012711.pdf

1. There are two ways of provisioning:

– using TFTP/FTP/HTTP server and pushing it’s address with the DHCP option, in case of using DHCP server in your network. In this case the phone will try to download the configuration/firmware from the server specified during the next reboot. But we need to reboot phones forcibly after that.

– without using DHCP server and dhcp-options. Just telling the phone with a direct HTTP request the URL path of config file/firmware to load, either from browser, or from Linux console, using curl. In this case the phone reboots automatically to apply the newly downloaded config/firmware (if there is an active call, the phone waits for its end and only then reboots to aply config. But I haven’t tried to upgrade firmware during the active call).

Download the archive with firmware, unpack it and rename the firmware file from something like spa50x-30x-7-4-9c.bin to spa.bin.

Next, we need some server, e.g. a small simple HTTP server weborf.
After installing, run it, specifying the directory with spa.bin file:

weborf -p 8000 -b /home/lexus/downloads/spa_303_firmware_7.5.5/

If there is Python installed on your machine, you may use its built-in http-server, running this command from a directory with spa.bin:

python -m SimpleHTTPServer 8000

Remember that it’s not always possible to skip firmware releases, for example I tried:
– 7.5.2 —> 7.6.1 – unsuccessful
– 7.5.2 —> 7.5.5 – OK
– 7.5.1 —> 7.5.5 – unsuccessful
– 7.4.9c —> 7.5.5 – unsuccessful
– 7.4.9c —> 7.5.1 – OK.

Read below how to upgrade the firmware.

2. Let’s imagine, we need to change the configuration of a phone. We need to disable the Call Forward feature.
First of all look through the XML-config file of a working phone: http://phone.ip/admin/spacfg.xml
To disable CallForward feature we need to change this parameter from ‘Yes’ to ‘No’:
spa303_provisioning2

Tip: all XML parameters are called the same way as in the web-interface, but with underscore instead of spaces

Create the spa303.cfg text file in your web-server directory:
spa303_provisioning1

And now tell the phone using curl to apply it:

curl --anyauth -u admin:pass http://phone/admin/resync?http://websrv.ip:8000/spa303.cfg

3. You may also provision phones from web-interface:

http://phone-ip/admin/upgrade?http://10.145.13.51:8000/spa.bin
http://phone-ip/admin/resync?http://10.145.13.51:8000/spa303.cfg

… but this is not true way :) .

It’s much more cool to do everything with curl:

curl --anyauth -u admin:pass http://10.145.13.232/admin/reboot
curl --anyauth -u admin:pass http://10.145.13.229/admin/upgrade?http://10.145.13.51:8000/spa.bin
curl --anyauth -u admin:pass http://10.145.13.229/admin/resync?http://10.145.13.51:8000/spa303.cfg

… they say, it’s also possible to use ‘–digest’ option in curl, but I haven’t tried, as ‘–anyauth’ works fine.

Tips and Hints:

Assuming you’re using ISC-DHCPD server:

        host spa303-1353 {      hardware ethernet 3c:ce:73:d3:f9:dc;
                                fixed-address 10.145.14.103; }

        host cisco303-1354 {    hardware ethernet 3c:ce:73:d3:e9:e4;
                                fixed-address 10.145.14.104; }

…and need to get all phone IP addresses from its config. Do:

grep -A1 spa dhcpd.conf | grep -vE '^#' | grep fixed-address | grep -o '[0-9]\{1,3\}\.[0-9]\{1,3\}\.[0-9]\{1,3\}\.[0-9]\{1,3\}'
grep -A1 cisco dhcpd.conf | grep -vE '^#' | grep fixed-address | grep -o '[0-9]\{1,3\}\.[0-9]\{1,3\}\.[0-9]\{1,3\}\.[0-9]\{1,3\}'

… and create a text file SPA_ips_from_dhcp.txt .

But DHCPd config may contain records of non-existent phones, that’s why we need to check if the IP addresses are real network devices (that they reply to OPTIONS SIP-requests), and these devices are Cisco and/or Linksys phones (useragent is Cisco… or Linksys…).

We’ll use sipvicious tool for that (make sure to have Python installed to run it):

python svmap.py --inputtext=/home/lexus/SPA_ips_from_dhcp.txt | grep -i SPA | awk '{print $2}' | sed 's/.....$//'

… and write this list to SPA_ips_alive.txt .

Now it’s time to provision the actual list of IP-phones with the script:

spa303_provisioning3

Linphone: command line interface

Tuesday, November 24th, 2015

voip_nerd
Wanna be a real VoIP nerd? :-) Let’s use Linphone from a command line!

1. ‘linphonec’ – enter the CLI.
2. ‘help’ – list available commands. Now it’s time to create a profile and connect to PBX
3. ‘help proxy’ – show help.
3.1. ‘proxy add’ – and press Enter. Answer to the appeared questions (just look at listing below):

linphonec> proxy add
Adding new proxy setup. Hit ^D to abort.
Enter proxy sip address: 10.1.51.13
Your identity for this proxy: sip:1301@10.1.51.13
Do you want to register on this proxy (yes/no): yes
Specify register expiration time in seconds (default is 600): 
Expiration: 0 seconds
Specify route if needed: 
No route specified.
--------------------------------------------
sip address: 
route: 
identity: sip:1301@10.1.51.13
register: yes
expires: 0
registered: no
--------------------------------------------
Accept the above proxy configuration (yes/no) ?: yes
Proxy added.
linphonec> 
Password for 1301 on "pbx.secretcompany.com": MeGaSeCuRePaSs

linphonec> Unregistration on sip:10.1.51.13 done.
linphonec>

Yes, the message ‘Unregistration on sip:10.1.51.13 done.’ seems strange, but tcpdump shows that everything is OK.

3.2. Now we may list our proxies:

linphonec> proxy list
****** Proxy 0 - this is the default one - *******
sip address: 
route: 
identity: sip:1301@10.1.51.13
register: yes
expires: 0
registered: no
linphonec>

4. Let’s call via default proxy:

linphonec> call 79991234567
Establishing call id to <sip:79991234567@10.1.51.13>, assigned id 1
Contacting <sip:79991234567@10.1.51.13>
linphonec> Call 1 to <sip:79991234567@10.1.51.13> in progress.
linphonec> Remote ringing.
linphonec> Early media.
linphonec> Call 1 with <sip:79991234567@10.1.51.13> early media.
Call 1 with <sip:79991234567@10.1.51.13> connected.
Call answered by <sip:79991234567@10.1.51.13>.
linphonec> Media streams established with <sip:79991234567@10.1.51.13> for call 1 (audio).

We may look active calls with ‘calls’ command.
This is how it looks like while ringing:

linphonec> calls
Call states
Id |            Destination              |      State      |    Flags   |
------------------------------------------------------------------------
2  | sip:79991234567@10.1.51.13          | OutgoingEarlyMedia | 

And this is how it looks like during an established call:

linphonec> calls
Call states
Id |            Destination              |      State      |    Flags   |
------------------------------------------------------------------------
2  | sip:79991234567@10.1.51.13          | StreamsRunning  | 

If you want to terminate a call, just type ‘terminate’ and press Enter.

If you have some troubles with sound and your PC is behind NAT, play with following parameters: ‘firewall’ and ‘nat’. Maybe you need ‘firewall none’ (it helped me at previous linphonec setup with one-way sound).

5. You may quit linphonec with ‘quit’ command. And these are history log, call log and configuration file in your home directory:

lexus@lexus:~$ ls -lh .linph*
-rw------- 1 lexus lexus  162 нояб. 24 15:10 .linphonec_history
-rw------- 1 lexus lexus 2,5K нояб. 24 15:10 .linphonerc

6. Read the documentation for more information.

sed: batch file rename

Friday, October 16th, 2015

Deleting plus sign from multiple filenames.

Is:

-rw-r--r--. 1 root root  153771 Oct 16 10:11 node-01-1444744974.2017874_in_+38050190.ogg
-rw-r--r--. 1 root root  167217 Oct 16 10:11 node-03-1444736219.1609540_in_+38050190.ogg
-rw-r--r--. 1 root root  141165 Oct 16 10:11 node-07-1444726601.1585794_in_+38073454.ogg
-rw-r--r--. 1 root root  193136 Oct 16 10:11 node-27-1444726479.1648259_in_+38073454.ogg

Must be:

-rw-r--r--. 1 root root  153771 Oct 16 09:58 node-01-1444744974.2017874_in_38050190.ogg
-rw-r--r--. 1 root root  167217 Oct 16 09:58 node-03-1444736219.1609540_in_38050190.ogg
-rw-r--r--. 1 root root  141165 Oct 16 09:56 node-07-1444726601.1585794_in_38073454.ogg
-rw-r--r--. 1 root root  193136 Oct 16 09:57 node-27-1444726479.1648259_in_38073454.ogg

Script:

#!/bin/bash

for i in *ogg
do
	mv "$i" "`echo $i | sed 's/\+//'`"
done